In this first article of a multipart series, we will configure Microsoft 365 Azure Active Directory (Azure AD) to support building a web application that uses Spring Boot authentication. The official Microsoft documentation highlights key concepts for this process but rushes through several steps. In later articles we will build an example oauth2 authenticated application which uses this Azure AD configuration.
Spring Boot Authentication Overview
A number of steps are needed to build an oauth2 Spring Boot user authentication example using Azure AD. However, before we can begin coding we need an active Microsoft 365 Business subscription which is configured to support our web application. Once Microsoft 365 is configured, we can use properties obtained from the portal to bootstrap our Spring Boot starters for oauth2 and Azure AD.
What is Microsoft 365
Formerly known as Office 365, this monthly subscription from Microsoft is ubiquitous in the business world. Most customers purchase it for the core office applications and email, but it also includes an often overlooked feature. Most business subscription plans also include a license for a basic version of Azure AD, Microsoft’s LDAP Directory solution.
Prerequisites
For the purposes of this article, we’ll assume you have a typical small business setup. That means you already have a Microsoft 365 subscription, several user accounts, and have administrator access to the Microsoft portal.
Manage Azure AD
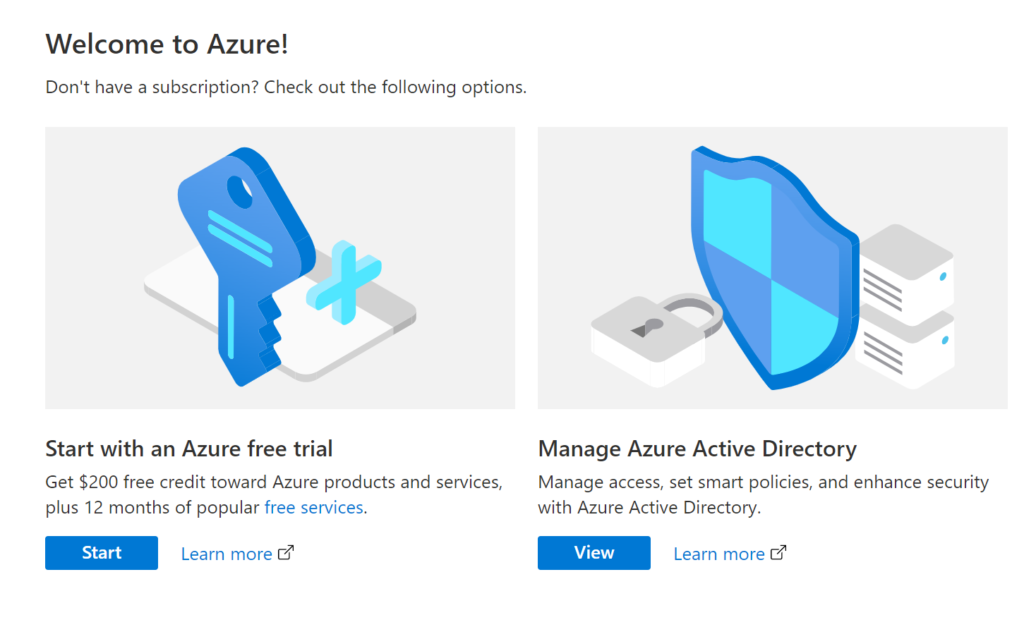
There are two primary ways to get to Azure AD via a web browser. You can either start at the top of the Microsoft portal and navigate your way through the maze, or just go directly to https://portal.azure.com. Once there, click on the button to view “Manage Azure Active Directory”
Register an Application in Azure AD
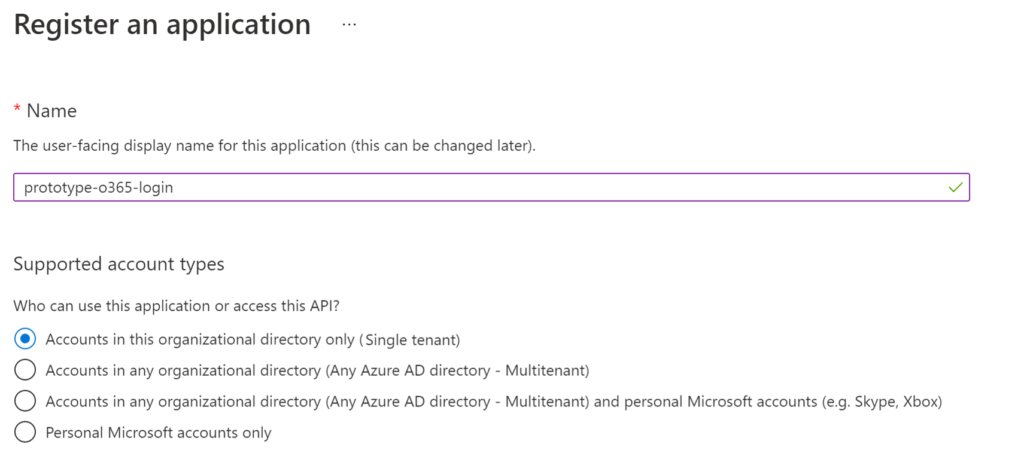
The first step in this configuration is to create a new application profile. Select “App Registrations” from the main menu in Azure AD and complete the form by adding a name, keeping the default options, and clicking the “Register” button.
The new application will be displayed with a number of system generated identifiers, as seen below.

These identifiers are sensitive, so treat them like passwords and keep them private. Two of these parameters will be needed for the Spring Boot authentication example application. Use the clipboard tooltip icon and make copies of the “Application (client) ID” and “Directory (tenant) ID” values and store them in a safe location for later.
Adding a Client Secret
Click the “New Client Secret” option from the “Certificates & Secrets” menu of your registered application.

Add a “description” and select an “Expires” option from the form. Set the expiration length based on your company’s security policies and posture. Generally the shorter the expiry the better. But note that this value also greatly depends on your level of IT support staffing to determine how frequently the secret can be rotated and downstream applications updated.

The generated client secret will contain several sensitive values that should be treated like passwords.

Make a copy of the “Value” and store it in a safe location for later. You may also want to add the expiry date to an ops calendar so the rotation is not overlooked in the future.
Configure Platform Authentication
From the app registration, select the “Authentication” menu and then click “Add a platform“.

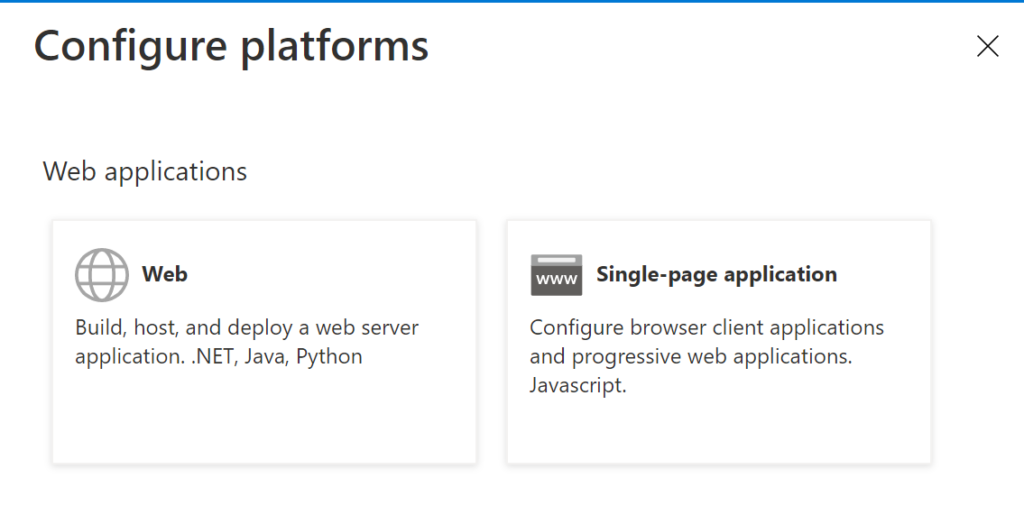
Choose the “Web” option from the resulting “Configure platforms” form. Note that depending on your Microsoft 365 subscription level, you may see more platform options.
Add a redirect URI to support local workstation development. You will need to choose a value that will not collide with any other routing within your system; The recommended default is seen below.
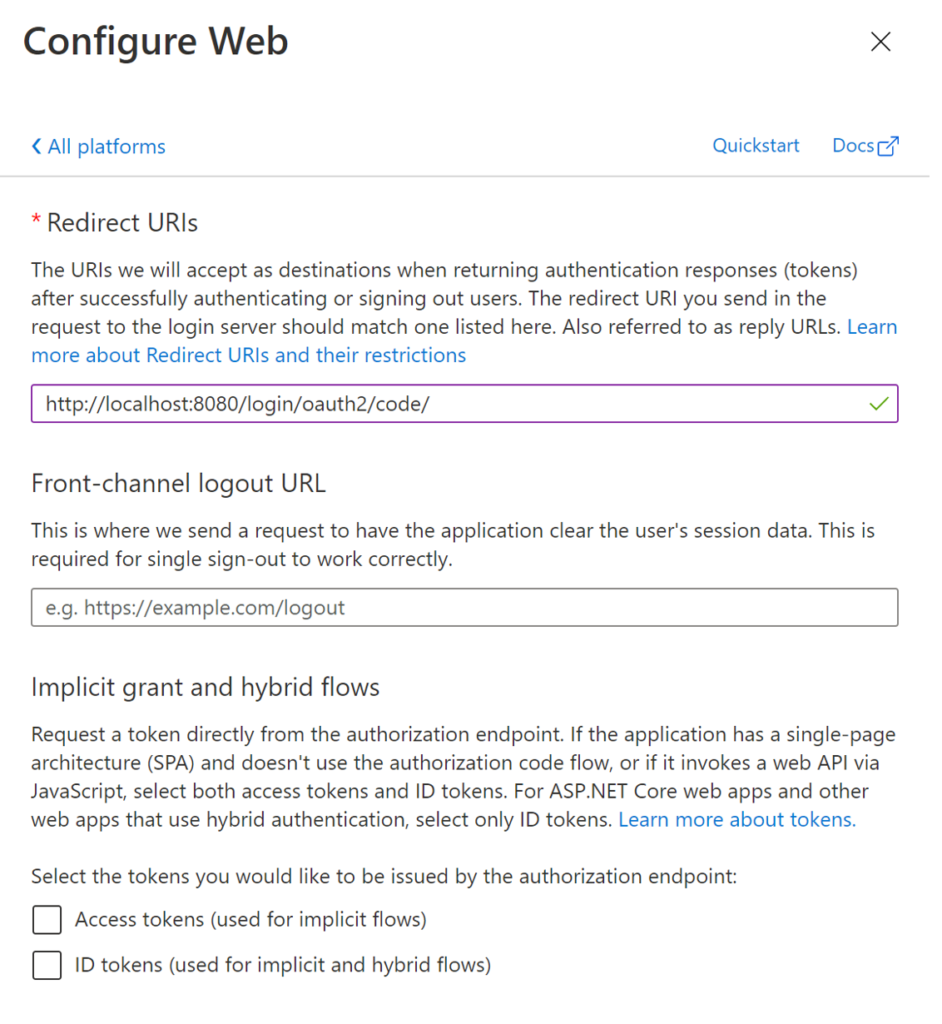
The default “Redirect URI” can be copied below, and leave all other default values in place before clicking the “Configure” button.
http://localhost:8080/login/oauth2/code/
Create Application Roles
Now that we have the oauth2 routing configured for the application, we need to create application roles. An application’s roles will vary greatly depending on its purpose. For our example, we will only create an administrator (super user) role. In a real application, you most likely will have several roles supporting various types of functionality.
Select the “App roles” menu from the app registration, then click “Create app role“.
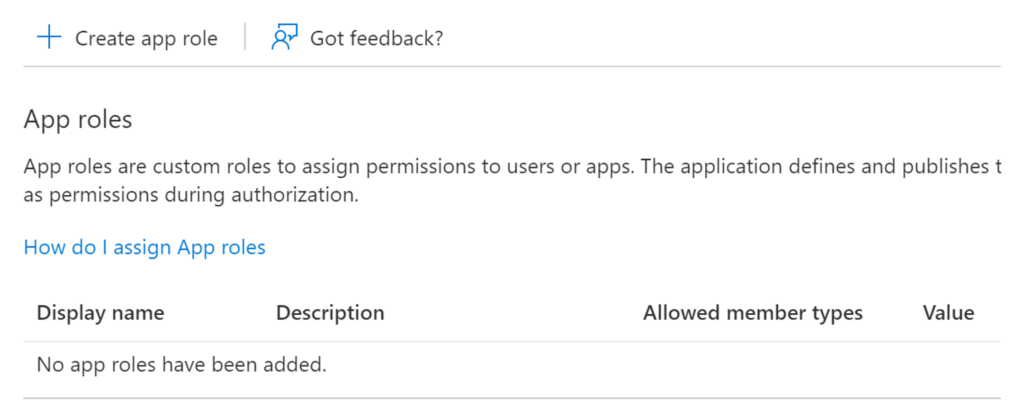
Provide the form values then click “Apply“.
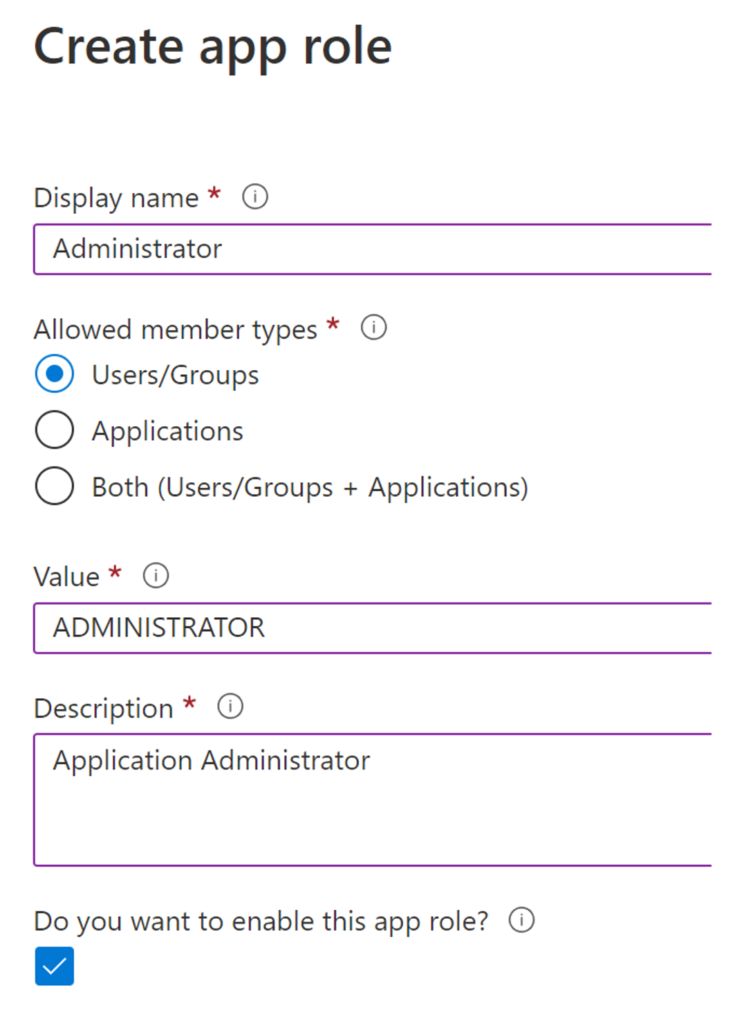
There is some discretion on how you name the roles. For this example, set the value (used in the code) in all caps and the other values in proper case.
Assign Users and Groups
Select “Enterprise applications” from the Azure AD portal menu. Next select your application from the list of “All applications“. Finally, select “Users and groups” and click “Add user/group“.
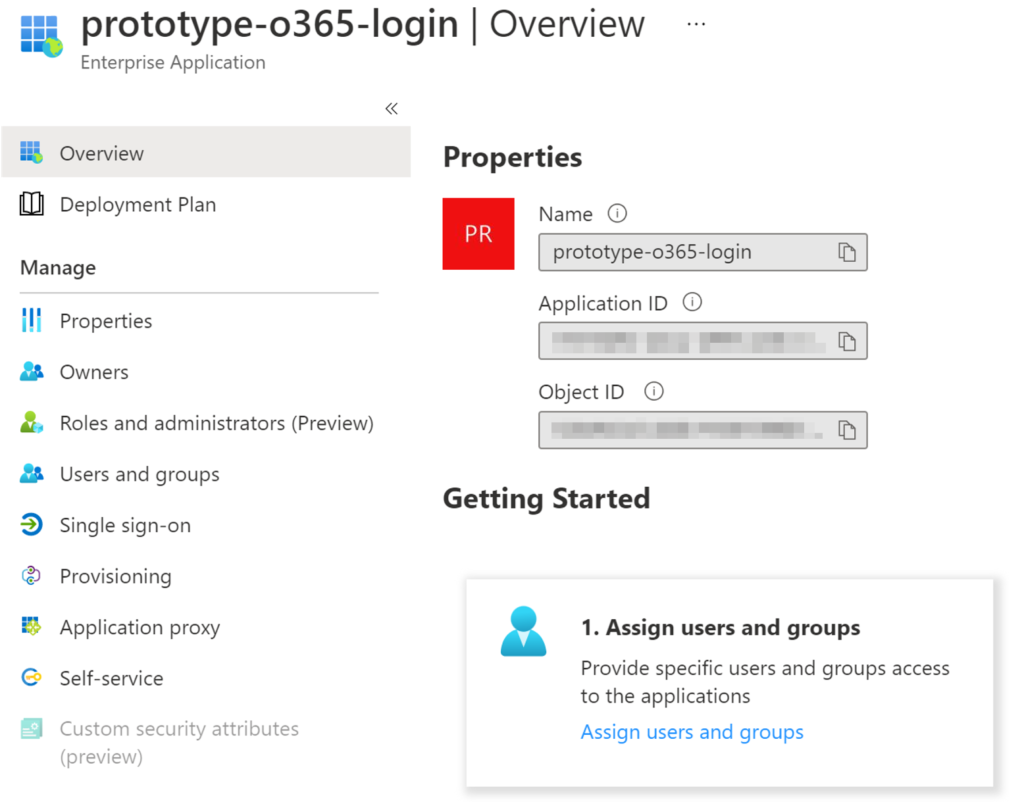
Select a user in your organization, then add a role and click “Assign“. If you created several roles earlier, lather rinse repeat on this process.
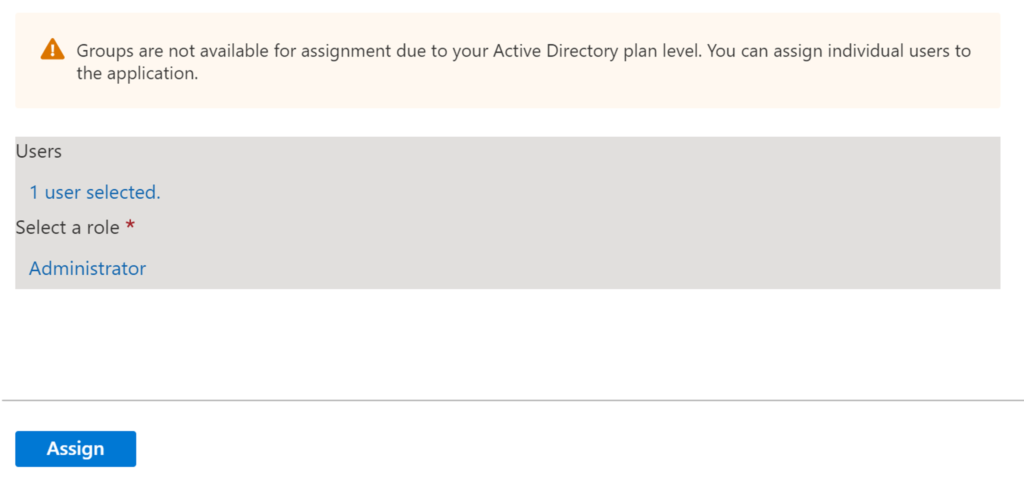
Note that your Microsoft 365 subscription level will determine what assignments you can make; Basic subscriptions will only allow you to assign users directly (no group assignments).
Spring Boot User Authentication Example
This completes the basic setup for Azure AD. In the next article, we will use the Spring Boot Initialzr to start a new Java project using Gradle.

